Tuesday, March 29, 2011

Daring Bakers March 2011: Yeasted Meringue Coffee Cake (Two Ways)


Right now, things in my life are awfully uncertain.

We have no idea when The Hubble is going to get his orders. Which means we have no idea if the Army is going to move us or if we have to pay for me and Little Butt to move out of pocket.

We have put an application in on a house down in Texas, but we don't know the status.

I have no idea if I'm carrying a girl or a boy.

We don't know if The Hubble will be on the promotion list this year or not. Not knowing this means we don't know the timeline for the next couple of years.

And to top it all off, my niece has been in the hospital since Saturday and we don't know when she will be getting out.

It kills me not to be with her. 

This little girl is more than a niece to me. And she's actually not a little girl. She's 19 years old with a husband and a baby of her own. But still.

When she was about 5 years old, my older sister got into some trouble and my mother got custody of my niece and nephew. My Jer Bear deployed to Kuwait shortly after and my mother worked a (more than) full time job. Along with my niece (then 5), my nephew (then 2), there was also my baby brother (then 4). I was 17 years old and took on the role of 'mom.' 

I took the kids to school/daycare. Went to school myself. Picked them up from daycare. Made sure they did homework, ate dinner, had baths, went to bed on time. Then could I focus on my own schoolwork.

My mother was crazy busy at work and my younger sister was only 12. 

It was a lot. But I loved those kids as if they were my own.

To this day, I constantly mix up my daughter's and my niece's names. That's how much my niece means to me. She's my baby as much as my older sister's and my mother's.

But I can't be with her. And it's driving me nuts. 

But even through all this angst and uncertainty, there is one thing I can always count on...a delicious recipe from the Daring Bakers.

It may sound silly, but baking and cooking give me a sense of peace. If there is anything I can control in life, it is what I can create through food in the kitchen. 

The March 2011 Daring Baker’s Challenge was hosted by Ria of Ria’s Collection and Jamie of Life’s a Feast. Ria and Jamie challenged The Daring Bakers to bake a yeasted Meringue Coffee Cake.

I tried to think a little outside the box with this challenge. I didn't want to do exactly what the recipe called for so I looked through my pantry and came up with some ideas.

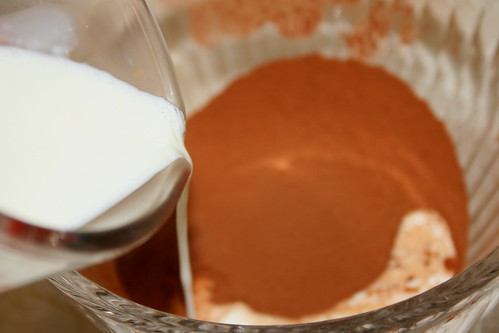
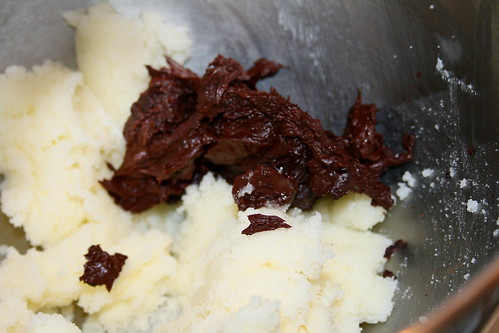
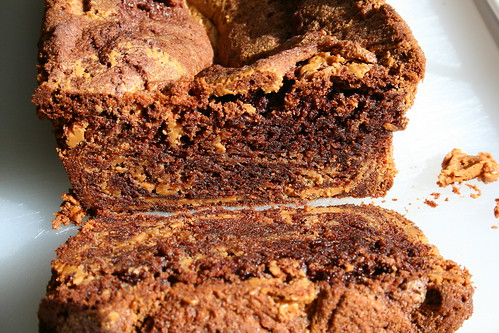
I recently made some cupcakes that called for 3 Tablespoons of sweetened, condensed milk. Have you ever heard of a recipe that calls for a can of sweetened, condensed milk MINUS 3 Tablespoons? Me neither. I wanted to use it instead of wasting it so I made dulce de leche. Which then helped me decide on a 'Mexican' themed coffee cake with dulce de leche, cinnamon, chili powder and cocoa powder.

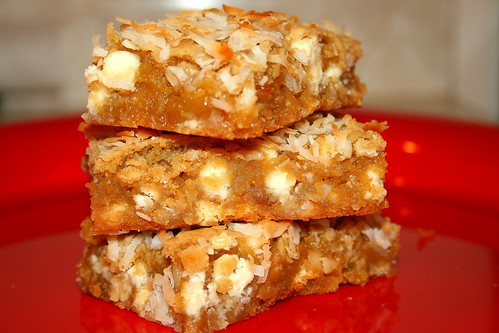
My love of pumpkin, the many cans I have stashed from the holidays and the bag of white chocolate chips gave birth to my pumpkin coffee cake.

My family can't handle 2 whole coffee cakes, but I wanted to make them both. So I took them to a friend's house. And also gave some to another friend. 

All the reviews came back: the 'Mexican' one was good. The pumpkin one was amazing!

The pumpkin was also my favorite. But the 'Mexican' one was very fun. I think next time I would use chopped chocolate to get melty chocolate instead of the powder. 

Wanna make your own?? You can either use the same ingredients I used or come up with your own fillings. Either way, have fun with it! Here we go!


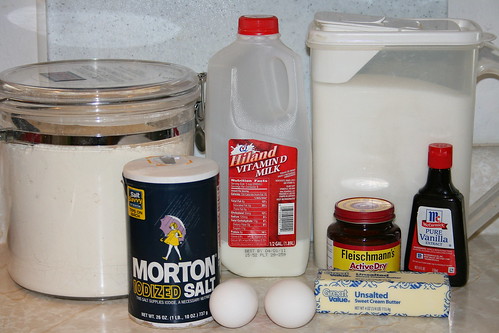
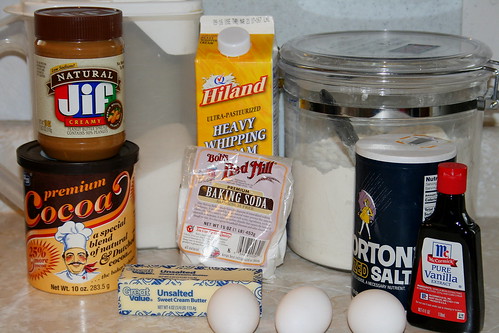
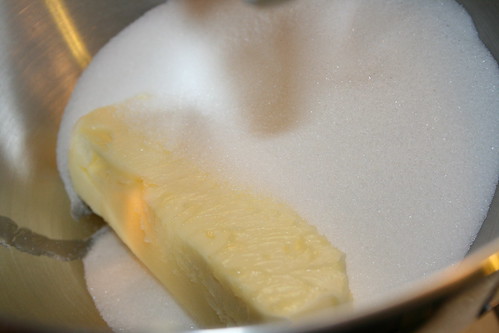
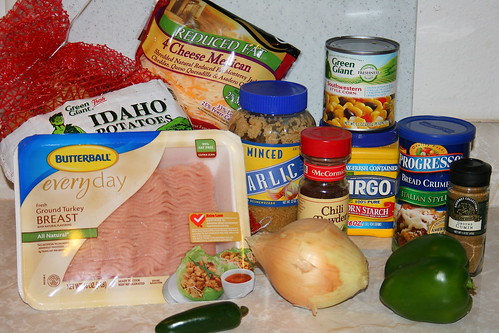
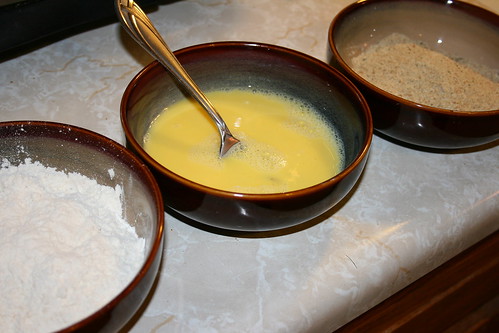
Grab your ingredients: all purpose flour, sugar, whole milk, salt, eggs, active dry yeast, unsalted butter, vanilla and your filling ingredients.


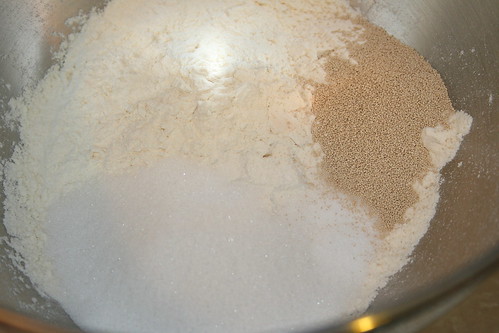
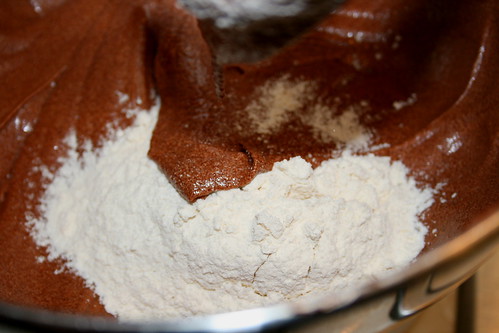
Start by making the dough. In a large mixing bowl, combine the 1 1/2 cups of the flour, the sugar, salt and yeast.


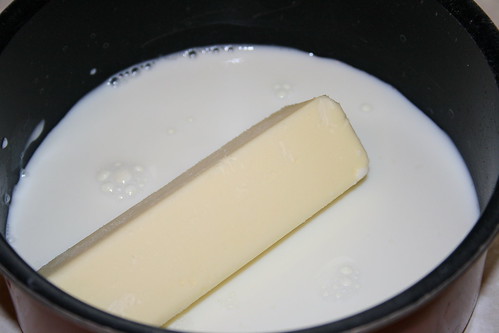
In a medium saucepan combine the milk, water and butter until warm and the butter is just melted.


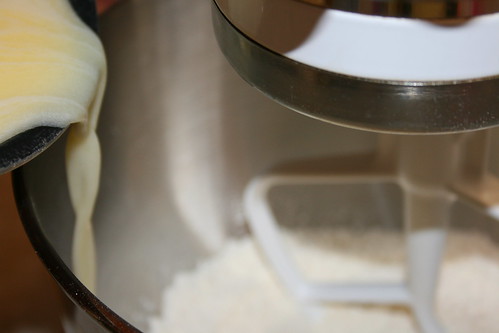
With the electric mixer on low, add the warm liquid mixture to the flour/yeast mixture. Beat until well blended, then raise the mixer to high and beat for about 2 minutes.


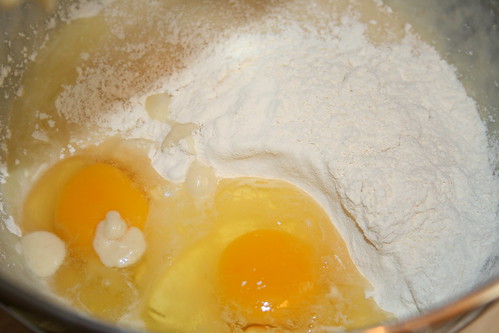
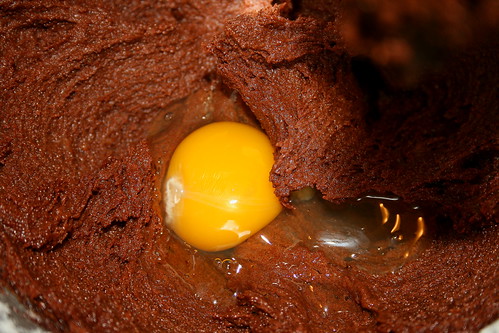
Add the eggs and another cup of the flour. Beat for another 2 minutes.


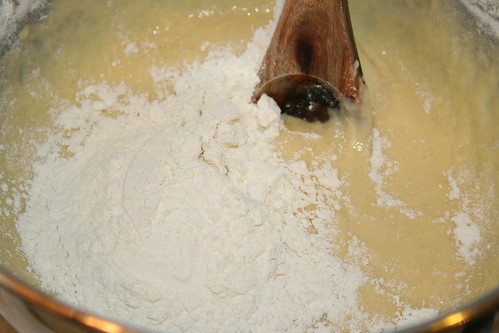
With a wooden spoon, mix in as much of the remaining 1 1/2 cups flour until a dough that sticks together is formed. I ended up using the entire 1 1/2 cups of remaining flour.


Turn the dough out onto a floured surface and knead for about 8-10 minutes until a smooth, soft, elastic dough forms.


Place the dough in a lightly greased bowl (I used olive oil cooking spray). Toss the dough to oil all sides. Cover in plastic wrap and a towel and let rise about 45-60 minutes...


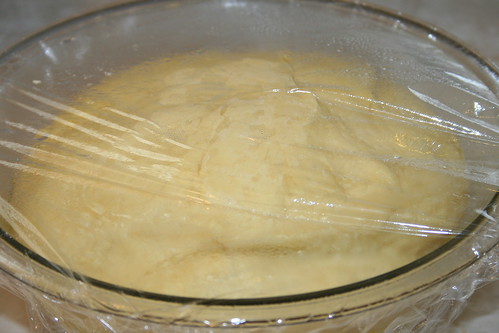
Until the dough doubles in size.


When the dough has doubled, make the meringue. Throw the egg whites and salt in a clean mixing bowl. Beat with the whisk attachment on low speed for 30 seconds then turn the mixer up to high until the egg whites turn foamy and opaque.


At that point, add the vanilla...


And the 1/2 cup sugar (1 Tablespoon at a time)...


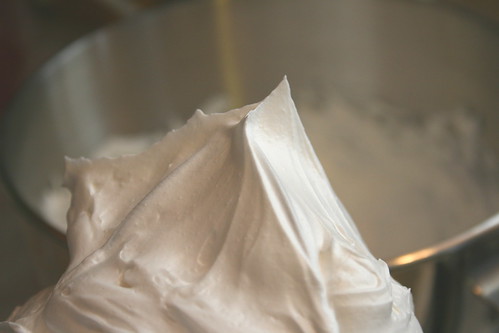
Until glossy, stiff peaks form.


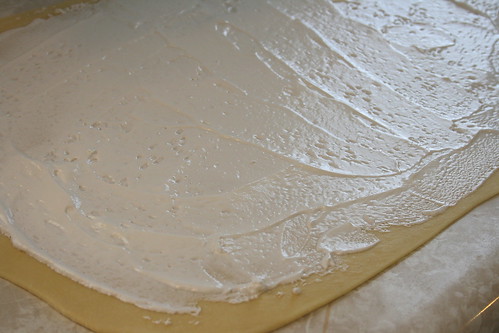
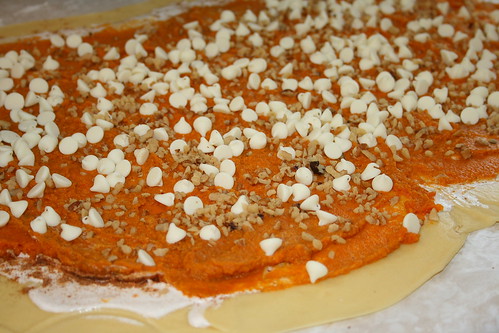
Now, punch down the dough and half it. Working with one half (while the other half is still wrapped in plastic) place the dough on a lightly floured surface. Roll it out to a 20x10 inch rectangle.

Spread half the meringue over the dough.


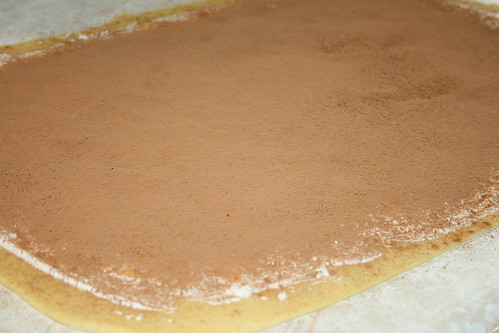
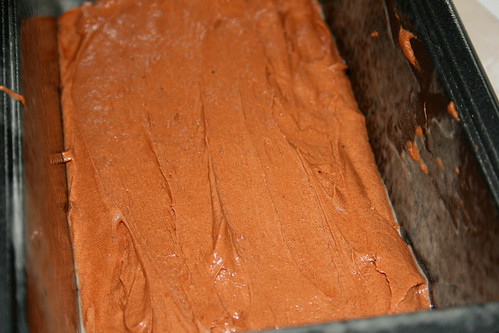
Spread/sprinkle on the fillings. This one is dulce de leche, cinnamon, chili powder and cocoa powder.

Roll the dough, jelly roll style, from the long end. Pinch the seams to close. Bring the ends together and pinch them to seal them, creating a ring.

Carefully transfer the ring, seam side down, onto a prepared baking sheet.


Repeat this process with the remaining dough and fillings.

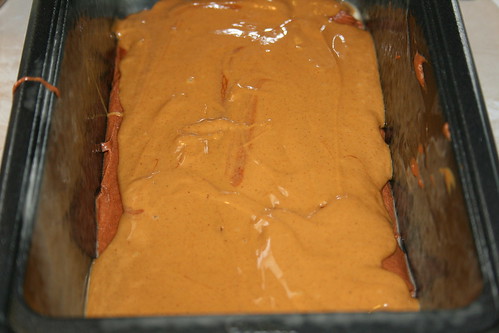
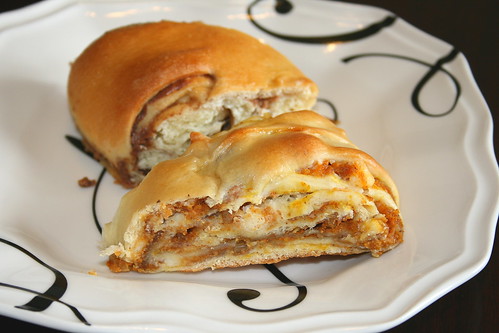
This one is pumpkin pie spice, pumpkin, white chocolate and walnut chips.


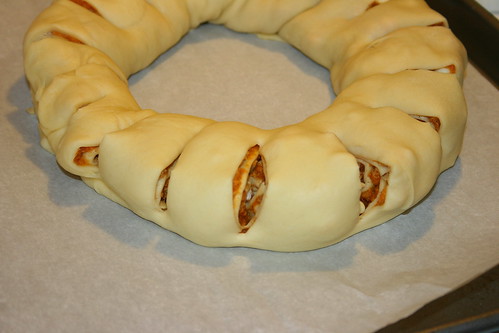
Once your rings are on the parchment lined baking sheets (each ring on it's own sheet) use kitchen shears or a sharp knife to cut slits in the dough in 1 inch intervals. Don't be afraid to cut deep into the dough.

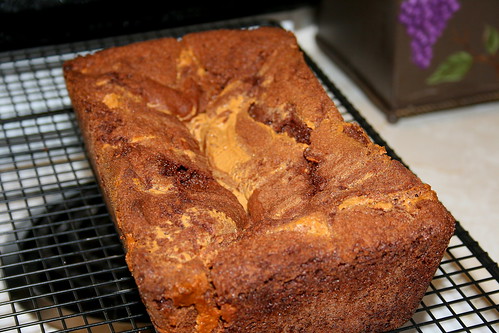
Cover with plastic wrap and allow to bake 25-30 minutes until golden brown. When done, carefully transfer onto a cooling rack and allow to cool completely.


Immediately before serving, you can top with powdered sugar. I opted to skip that step. 

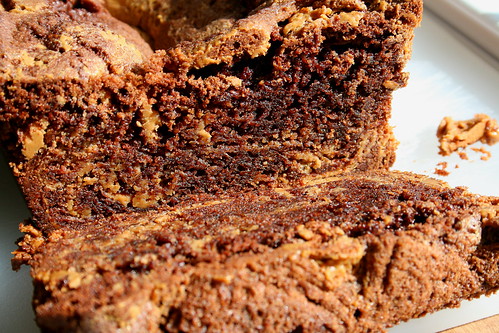
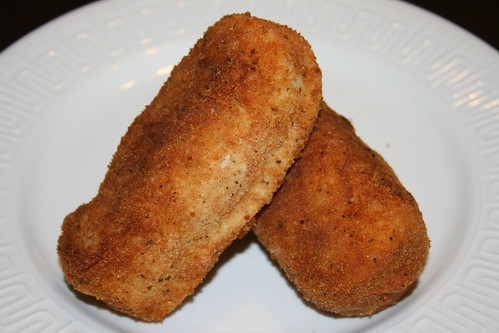
This 'Mexican' coffee cake was good...


But the pumpkin was heaven!

Serve up your coffee cake with a good friend (or more) and enjoy!!

Yeasted Meringue Coffee Cake
Adapted from The Daring Kitchen


Ingredients:

For the yeast coffee cake dough:
  • 4 cups all purpose flour
  • 1/4 cup granulated sugar
  • 3/4 teaspoon salt
  • 1 package (2 1/4 teaspoon) active dry yeast
  • 3/4 cup whole milk
  • 1/4 cup water
  • 1/2 cup (1 stick) unsalted butter, room temperature
  • 2 large eggs, room temperature
For the meringue:
  • 3 large egg whites, room temperature
  • 1/4 teaspoon salt
  • 1/2 teaspoon vanilla
  • 1/2 cup sugar
For filling 1:
  • 1 cup dulce de leche
  • 2 Tablespoons cinnamon
  • 1 Tablespoon chili powder
  • 2 Tablespoons natural unsweetened cocoa powder
For filling 2:
  • 1 Tablespoon pumpkin pie spice
  • 1 cup pumpkin puree
  • 1 cup white chocolate chips
  • 1/2 cup walnut chips
Directions:

Prepare the dough:
  1. In a large mixing bowl, combine 1 1/2 cups of the flour, the salt, sugar and yeast.
  2. In a saucepan combine the milk, water and butter. Heat over medium heat until it is warm and the butter is just melted.
  3. With an electric mixer on low speed, gradually add the warm liquid to the flour/yeast mixture, beating until well blended. Increase mixer speed to medium and beat 2 more minutes.
  4. Add the eggs and 1 cup flour, beat for another 2 minutes.
  5. Using a wooden spoon, stir in enough of the remaining 1 1/2 cups flour (I used it all) to make a dough that sticks together.
  6. Turn out onto a floured surface and knead for 8-10 minutes, until the dough smooth, elastic and soft. (Keep work surface floured and add more as needed).
  7. Place the dough in a lightly greased bowl (I used olive oil cooking spray) and turn to coat all sides of the dough. Cover with plastic wrap and a towel and allow to rise until double in size, about 45 minutes to an hour.
Once the dough is double in size, prepare the meringue:
  1. In a clean mixing bowl (metal or plastic), beat the egg whites and the salt, first on low speed for 30 seconds, then increase to high until foamy and opaque.
  2. Add the vanilla, then start adding the 1/2 cup of sugar 1 Tablespoon at a time as you beat, until stiff peaks form.
Assembly:
  1. Line to baking sheets with parchment paper.
  2. Punch down the dough and divide in half.  
  3. Working with one piece of the dough at a time (keep the other half wrapped in plastic), lightly flour a work surface and roll the dough out into a 20x10 inch rectangle.
  4. Spread half the meringue over the dough, up to about 1/2 inch away from the edge.
  5. Evenly spread/sprinkle your toppings over the meringue.
  6. Roll up the dough, jelly roll style, from the long side. Pinch the seams together to seal and bring the ends together and pinch to seal, forming a ring. Carefully transfer, seam side down, onto prepared baking sheet. 
  7. Using kitchen shears or a sharp knife, make cuts along the outside edge at 1 inch intervals (don't be afraid to cut deep into the ring, but not through the other side).
  8. Repeat with the remaining dough and fillings.
  9. Cover rings with plastic wrap and let rise again for 45 minutes to an hour.
  10. Preheat oven to 350 degrees F.
  11. Make an egg wash with a large beaten egg and 2 Tablespoons of water. Brush the tops of the rings with the egg wash.
  12. Bake in the preheated oven, 25-30 minutes or until golden brown. 
  13. Remove from oven. Carefully transfer to a cooling rack and allow to cool completely.
  14. Immediately before serving, sprinkle with powdered sugar (if desired).
  15. Slice and enjoy!!
  16. These are best eaten fresh, or the next day.


Thursday, March 24, 2011

Robin's $5 Chili


In my life as an Army Brat and now Army Wife, I have lived in many different places. I've seen many types of weather.

In Oklahoma, it was hot and humid...ALL THE TIME.

In Washington State it rained...ALL THE TIME.

In Texas it was sunny and warm...ALL THE TIME.

In Upstate New York it snowed...ALL THE TIME.

Are you catching a theme here?? These different states had their own kind of weather. But it was usually consistent. You pretty much knew what you were going to get at certain times of the year.

Here in the Middle of Nowhere Midwest, there's really no telling what type of weather you are going to get from one day to the next. The weather here is so unpredictable and sporadic it is ridiculous.

For example: the last two days have been gorgeous! We broke out our short sleeved shirt and sandals. The Hubble even brought out his shorts! It was sunny and in the 70's and 80's. Not a cloud in the sky. We were finally able to get outside and play.

Then today came. The high is in the 40's today. The wind chill is supposed to be below freezing. It's cloudy and windy.

To say that I'm annoyed with this place just doesn't cut it. I'm fed up. I can't wait to move. LOL!

But hey, when life gives you lemons right???

So, on a cold Midwestern day like today, I'm celebrating with chili!

I mean, a piping hot bowl of chili topped with melty cheese and crumbled honey cornbread sounds like just the thing to warm a soul and make a person look on the bright side.

I got this recipe from my good friend Robin.

Whenever I would go over for Sunday coffee and Robin had a big pot of this chili on the stove, I knew it was going to be a good day.

This chili is so easy that it's hard to imagine why more people don't know about it. But that's why I'm here to help you out.

What is even better about this chili (besides how quick and easy it is) it's cheap! Now, it's not $5...it's more than that. The price especially depends on what type of meat you buy. I get the expensive ground turkey so my chili probably cost around $10. But hey, that's still cheap for how much this recipe makes!

And when the weather changes back to the 80's tomorrow, this chili can still be used a different way. Grab a few eggs and start an omelet. Throw some of this chili in the omelet, cold from the fridge. Throw some shredded cheese in the omelet as well. Top the whole thing with your sour cream and grab a piece of that cornbread from last night. Now you have yourself a breakfast of champions! And a great way to use up those leftovers!!

So...if the initial talk about this chili didn't sell it to you, the omelet just did. Now let's get cooking.


Start by grabbing your ingredients: 2 pounds ground turkey (or beef), 2 cans rotel tomatoes (heat depending on your tastes), 1 can kidney beans, 1 can pinto beans, 1 can black beans, 1 medium green bell pepper, 1 medium onion, 2 packets chili seasoning.


Dice up your bell pepper and onion. Heat a little oil in a large skillet. Toss in the pepper and onion and heat until tender, about 3-5 minutes.


Now toss in your meat and cook it until it's thoroughly cooked through.


Transfer the meat mixture to a large pot. Add in the beans, rotel tomatoes (with all the juices from the beans and tomato cans) and the seasoning packets. Mix until well combined.


Let simmer on low about 30 minutes.


Top with toppings of your choice (mine are cheese and sour cream), serve with cornbread and enjoy!!!

Robin's $5 Chili

Printer Friendly Version

Ingredients:

  • 1 medium green bell pepper, diced
  • 1 medium onion, diced
  • 2 Tablespoons oil
  • 2 pounds ground beef or ground turkey
  • 2 cans rotel tomatoes (or 1 can per pound of meat)
  • 1 can kidney beans
  • 1 can pinto beans (not Ranch style beans)
  • 1 can black beans
  • 2 packets chili seasoning
Directions:
  1. Heat oil in a large skillet until glistening. Add bell pepper and onion; cook until tender, about 3-5 minutes.
  2. Add ground meat, heat until thoroughly cooked through.
  3. In a large pot, combine meat mixture, rotel tomatoes (with juice), beans (with juice) and chili seasoning packets. Mix until well combined.
  4. Allow to simmer on low heat about 30 minutes.
  5. Top with selected toppings, serve with cornbread, and enjoy!!

Monday, March 21, 2011

Chocolate Peanut Butter Swirl Poundcake


Peanut Butter and Jelly met when they were both young. They instantly fell in love with one another. They spent tons of time together and believed they would last forever.

Then one day, Peanut Butter met Chocolate. Chocolate was tall, dark and mysterious. Peanut Butter couldn't help but be intrigued by this new discovery.

Peanut Butter found that he and Chocolate were like a match made in heaven.

Peanut Butter kept thinking about his old love, Jelly, but just couldn't shake his roaming thoughts of Chocolate.

Even when Peanut Butter and Jelly were together, Peanut Butter dreamed of being with Chocolate.

What was Peanut Butter to do?? Who should he choose??

Fortunately, for us today, Peanut Butter chose to be with Chocolate. :-)

When I was going over the recipe for this month's Cake Slice Bakers cake I knew I wanted to do something a bit...more...than just a chocolate creme pound cake.

I wanted some additional flavor to give this cake more substance.

See...I'm not really a chocolate lover.

I mean, I like the stuff well enough, but it's not always my first choice. (Sorry Chocolate! Please don't take it personally).

I went through my pantry and thought of white chocolate, butterscotch, even cinnamon. At one point, peanut butter entered my mind but it just as quickly flew right out again.

I found myself on the phone with my Older Sister asking her opinion (I tend to brainstorm with her about cooking).

Again, she brought up peanut butter. We got to talking about the idea and I became more and more sold on the idea.

I couldn't figure out how to make it work at first then I discovered how I could incorporate these two flavors into one delectable cake.

The cake was rich, but not too rich since it uses Dutch process cocoa.

The peanut butter in the cake provided an extra layer of depth.

It was chewy on the inside and crispy on the outside.

To me, it was perfect, even if the middle sunk (I think I over swirled with my knife: lesson learned??).

I took this to a dinner party and came home with only one piece that Little Butt and I shared for breakfast the next day with a glass of milk.

Dear Jelly,
You will always be my first love...but today...today my heart belongs to Chocolate.
Love,
Peanut Butter.

Let's get baking:


Grab your ingredients together: unsweetened Dutch process cocoa powder, sugar, all purpose flour, baking soda, salt, heavy cream, unsalted butter, pure vanilla extract, eggs and creamy peanut butter.


Sift the cocoa powder into a small, heat proof bowl. Pour the cream into a heat proof measuring cup. Microwave the cream to boiling, about 30 seconds to a minute. Then pour the cream over the cocoa powder. Mash it and stir it to dissolve the cocoa powder and create a paste.


In a separate bowl, whisk together the flour, baking soda and salt.


Throw the butter and sugar in the bowl of an electric mixer and cream it together until light and fluffy (btw, did you know that EVERY time I type 'fluffy' I actually type 'fluffly' and have to delete and correct it. Just a tasty tidbit for ya), about 2-3 minutes.


Toss the cocoa powder paste into the butter/sugar mixture and beat it in until smooth.


Add in the eggs, one at a time, scraping the bowl after each addition.


Stir in the vanilla.


Now turn the mixer on low and mix in the flour mixture 1/2 cup at a time, scraping the bowl after each addition. After the last addition, raise the speed to medium and mix for 30 seconds.


Spread half of the cake batter into the bottom of your prepared pan...


Then spread half of the peanut butter over the batter. Repeat with the remaining cake batter then peanut butter.


Take a knife and cut the peanut butter into the cake batter creating a 'swirl.' Throw the cake in your preheated oven and bake it until a toothpick inserted in the center comes out clean, about an hour and 10 minutes.


Let cool in the pan for about 5 minutes then transfer over to a cooling rack to cool completely.


Slice, serve and enjoy!!!

Chocolate Peanut Butter Swirl Poundcake
Adapted from Cake Keeper Cakes by Lauren Chattman

Printer Friendly Version

Ingredients:

  • 6 Tablespoons unsweetened Dutch process cocoa powder (can sub regular unsweetened cocoa powder if unavailable)
  • 1/4 cup heavy cream
  • 1 cup plus 2 Tablespoons unbleached all-purpose flour
  • 1/4 teaspoon baking soda
  • 1/4 teaspoon salt
  • 1/2 cup (1 stick) unsalted butter, softened
  • 1 1/2 cups sugar
  • 3 large eggs
  • 1 teaspoon pure vanilla extract
  • 1/2 cup creamy peanut butter
Directions:
  1. Preheat oven to 325 degrees F.
  2. Grease a 9-inch by 5-inch loaf pan and dust with flour (I used Baker's Joy spray)
  3. Sift the cocoa powder into a small heatproof bowl. 
  4. Pour the heavy cream into a heat proof measuring cup. Microwave until boiling, about 30 seconds to 1 minute depending on microwave power.
  5. Pour the hot cream over the cocoa powder. Mix until cocoa powder is dissolved and mixture is thoroughly combined. Set aside to cool.
  6. Combine the flour, baking soda and salt in a medium mixing bowl.
  7. Cream together butter and sugar with an electric mixer until light and fluffy, about 2-3 minutes, scraping down sides of bowl as necessary.
  8. Add the cocoa powder paste to the butter/sugar mixture and beat until smooth.
  9. With the mixer on medium-low speed, add the eggs, one at a time, scraping down the sides of the bowl after each addition.
  10. Stir in the vanilla.
  11. Turn the mixer to low speed and add the flour mixture, 1/2 cup at a time, scraping down the sides of the bowl after each addition. After the last addition, mix for 30 seconds on medium speed.
  12. Microwave the peanut butter until runny, about 15-30 seconds.
  13. Pour half of the cake batter into the loaf pan, smooth out evenly with a spatula.
  14. Pour half of the peanut butter over cake batter, smooth out evenly. Repeat with remaining cake batter and peanut butter, ending with peanut butter.
  15. Run a knife through the peanut butter and batter, all the way to the bottom, to swirl the peanut butter through the cake batter.
  16. Bake the cake until first to the touch and a toothpick inserted in the center comes out clean, about 1 hour and 10 minutes. 
  17. Let cake cool in the pan for 5 minutes. Transfer to a cooling rack to cool completely.
  18. Slice, serve and enjoy!

Wednesday, March 16, 2011

Operation Layla Bake Sale


When I first moved up to NY I, of course, didn't know anyone but The Hubble.

My first day of work, I was confronted by this girl Chrissy.

She had heard that I was moving up there, was going to be working at that store and that my husband was in the military.

She was dating a guy in the military and we started talking about our experiences.

Chrissy and I became FAST friends. And not just friends, we were CLOSE.

This woman, that I am so proud to know, was always full of laughter, love and life. Her very soul exuded radiance. She was beautiful and had the most vibrant personality. It was no wonder I fell in love with her almost immediately.

Chrissy was there for me in my lowest moments.

She was the one who came to sit by my side when The Hubble deployed for the first time. She ordered me pizza and answered the door when the delivery person came knocking. She checked on my constantly.


She was also the first (and only one of two) person to visit me in the hospital when Little Butt was born.

Chrissy was diagnosed with PCOS (poly cystic ovarian syndrome). She went from having one of the biggest and brightest personalities to being quiet and demure.

She was quiet all the time.

You could tell she was often on the verge of tears from the pain she was constantly feeling.

Chrissy had to go through several surgeries to remove cysts on her ovaries.

She missed a TON of work.

Needless to say, our boss was none too happy about that.

But what could be done?? She was in constant pain and needed the medical procedures and time off.

Luckily, Chrissy was a full time employee and had insurance coverage.

When I first heard of Layla and read her story I knew I needed to help in any way that I could.

Layla's story reminded me too much of my beloved Chrissy. Although Layla does not have the insurance nor the funds to cover the surgery that she desperately needs.

Some ladies on twitter decided to take Layla's situation into their own hands and an online bake sale was born!

I was asked if I wanted to contribute something and, of course, I said yes immediately.

So here is what I'm offering up for sale:


What are congo bars you ask?? They are cookies...with the texture of brownies!!! You can choose from either of these flavors, or create your own! Awesome right???

If you would like to read more about Layla's story, bid for my congo bars or see all the other amazing treats up for sale (there are 36 in total I believe), then head on over to the Operation Layla site!

Happy bidding!!

Monday, March 14, 2011

Daring Cooks March 2011: Papas Rellenas


One day this past summer, my older sister called me to rave about this fantastic new dish she had tried.

My mother had thrown a housewarming party for her new house and the guests brought some dishes to the party.

One of the dishes was ceviche.

My older sister told me how delicious this dish was. It was light and fresh. Citrusy from the lime juice with the perfect amount of heat from the jalapeno. It was soft and delicious served atop a crunchy tortilla chip.

The whole family loved it and made it several times over the course of the summer...calling me each time to tell me that I needed to make this as soon as possible.

I drug my feet. I asked them to send me the recipe. I never got around to making it.

Then comes this month's Daring Cooks challenge:

Kathlyn of Bake Like a Ninja was our Daring Cooks’ March 2011 hostess. Kathlyn challenges us to make two classic Peruvian dishes: Ceviche de Pescado from “Peruvian Cooking – Basic Recipes” by Annik Franco Barreau. And Papas Rellenas adapted from a home recipe by Kathlyn’s Spanish teacher, Mayra.

Sounds great right??? The perfect opportunity to make the dish that had been on my "to make" list for at least 6 months.

Unfortunately, my dreams of ceviche came to a screeching halt when I remembered that whole 'being pregnant' thing.

I posted on the Daring Cooks site asking if it would be safe for me to eat. After all...it's "cooked" right??

I held my breath when I read the researched response to my query. The answer I received was that it is safe as long as you have a reputable fish source. Great right??

Wrong! I live in the Middle of Nowhere Midwest. Where am I supposed to find a reputable fish monger?

Yeah...I'm not.

Fortunately, Kathlyn thought ahead and offered up an alternative Peruvian recipe for the vegetarian and vegans in the Daring Kitchen. This recipe allowed me to actually participate this month. Woohoo!

That being said, The Hubble would never allow a meatless meal in our home (while he's around anyway) so I put my own spin on the recipe provided to us.

I did a "Southwest" themed papa. And let me tell you...these were awesome! They were relatively easy to make (just a bit time consuming) and super delicious. I can totally see how these would make a wonderful handheld street food to Peruvians.

I love texture, so the crunch of the outer shell followed by the tenderness of the potato and meat filling was out of this world.

As we sat around the table eating these handheld delights, we talked about the different fillings we could stuff these with. Needless to say, we WILL be making these again.

Thanks for the fantastic challenge Kathlyn! These will be a staple in our house from now on!!

And now you can make this treat in your own home. Let's get cooking:


You will need: potatoes, ground turkey, minced garlic, onion, jalapeno, green bell pepper, Southwestern corn, chili powder, paprika, ground cumin, cornstarch, bread crumbs, eggs, all purpose flour, salt, pepper and seasoned salt.


Boil the potatoes, whole and unpeeled, until tender when poked with a fork. Drain and allow to cool.


While the potatoes are cooling, we can start on our filling. Heat some oil in a large skillet. Toss in the onions and caramelize them for about 5 minutes.


Toss in the jalapeno, bell pepper and garlic. Cook until the bell pepper and jalapenos are tender, about 3 minutes more.


Now toss in the ground turkey. Cook that bad boy up until it's not longer pink and it is totally cooked through.


Now add the corn, paprika, chili powder and ground cumin. Mix it all in until well combined.


Stir in the cheese until it is melted. Take the mixture off the heat and set it aside to cool.


Now let's head back to our potatoes. They should be cool by now so peel them and toss them back into the pot you cooked them in. Mash them up then add the cornstarch, salt and pepper. Knead and mix it all until the seasonings are thoroughly mixed through. Don't be afraid to taste it to make sure the potatoes are seasoned to your liking.


Now that we have our filling and 'dough' made we are ready to start preparing. Throw some oil in a pot to heat to about 350-375 degrees F.

You need three shallow bowls. One with flour, seasoned salt and chili powder. One with the eggs mixed with water. And the third with the bread crumbs mixed with salt (I know it seems like a lot of salt but you want these things seasoned well or they will be bland).


Take about 1/12th of the potato mixture and flatten it into your hand. Make an indention in the center.


Spoon a generous portion of the filling into the indention.


Close up the potato around the filling.


And roll them into potato shaped forms.


Now take them and roll them in the flour...


Then the egg...


Then the breadcrumbs.


And fry them up until they are golden brown. This took me about 2-3 minutes on each side.


When they are all fried up, drain them on paper towels and keep warm while frying the rest.


Serve and enjoy!!! We enjoyed our with salsa and sour cream.

Papas Rellenas de Carne
Adapted from The Daring Kitchen

Printer Friendly Version

Ingredients:

For the dough

  • 5 pound bag russet potatoes
  • 1/2 cup cornstarch
  • Salt and pepper to taste
For the filling
  • 2 Tablespoons oil (I used Extra Virgin Olive Oil)
  • 1 pound ground turkey
  • 1 medium onion
  • 1 medium green bell pepper
  • 1-2 jalapenos (depending on preferred heat)
  • 2 Tablespoons minced garlic
  • 1 (14 ounce) can Southwestern corn
  • 1 teaspoon ground cumin
  • 1/2 teaspoon paprika
  • 1/2 teaspoon chili powder
  • 1/2 cup shredded cheese
For the final preparation
  • 2 large eggs
  • 2 cups bread crumbs
  • 2 cups all purpose flour
  • salt (to taste)
  • chili powder (to taste)
  • seasoned salt (to taste)
  • oil for frying (2 inches worth)
Directions:

For the dough
  1. Boil unpeeled potatoes whole until tender when poked with a fork. Drain and let cool.
  2. When potatoes are cooled, peel and mash them (or force them through a potato ricer).
  3. Add cornstarch, salt and pepper. 'Knead' dough until all ingredients are mixed through and evenly distributed.
For the filling (best prepared while potatoes are cooling)
  1. Heat oil in a large skillet. Caramelize diced onion for about 5 minutes, stirring occasionally.
  2. Add garlic, diced jalapeno and diced bell pepper. Cook until jalapeno and bell pepper are tender, about 3 minutes.
  3. Add ground turkey. Cook until thoroughly cooked through.
  4. Add corn, ground cumin, paprika and chili powder. Mix until well combined.
  5. Mix in cheese until melted.
  6. Set aside to cool.
Final preparation
  1. Use three small bowls (or shallow containers) to prepare the papas. In one, combine flour, seasoned salt and chili powder. In the second, combine egg and water. In the third, combine bread crumbs and salt.
  2. Heat oil to about 350-375 degrees F.
  3. Flour your hands and scoop up 1/12th of the potato mixture. Flatten the mixture in your hand like a pancake and make an indentation in the middle for the filling.
  4. Spoon a generous amount of filling into the center and roll the potato closed, forming a smooth, potato shaped casing around the filling. Continue with the rest of the potato and filling (you should have 12 papas).
  5.  Dip each papa in the three bowls to coat: first the flour, then the egg and finally the bread crumbs.
  6. Fry the papas (in batches) until golden, about 2-3 minutes on each side.
  7. Drain on paper towels and keep warm while frying the remaining papas.
  8. Serve with salsa and sour cream. Enjoy!!
Related Posts with Thumbnails